 Eng
Eng  中文简体
中文简体 Home / News / Industry News / Brake Shoe Explained: What It Does, When to Replace It, and How to Do It Right
 Brake Shoe Explained: What It Does, When to Replace It, and How to Do It Right
 2026.03.11
 Industry News
Content
- 1 What Is a Brake Shoe and What Does It Do?
- 2 How the Drum Brake System Works Around the Brake Shoe
- 3 Brake Shoe vs. Brake Pad: Understanding the Key Differences
- 4 Warning Signs Your Brake Shoes Need Replacing
- 5 How to Inspect Brake Shoes Without Removing the Drum
- 6 Brake Shoe Replacement: Step-by-Step Overview
- 7 How Long Do Brake Shoes Last and What Affects Their Lifespan?
- 8 Brake Shoe Replacement Cost: What to Expect
- 9 Choosing the Right Brake Shoes for Your Vehicle
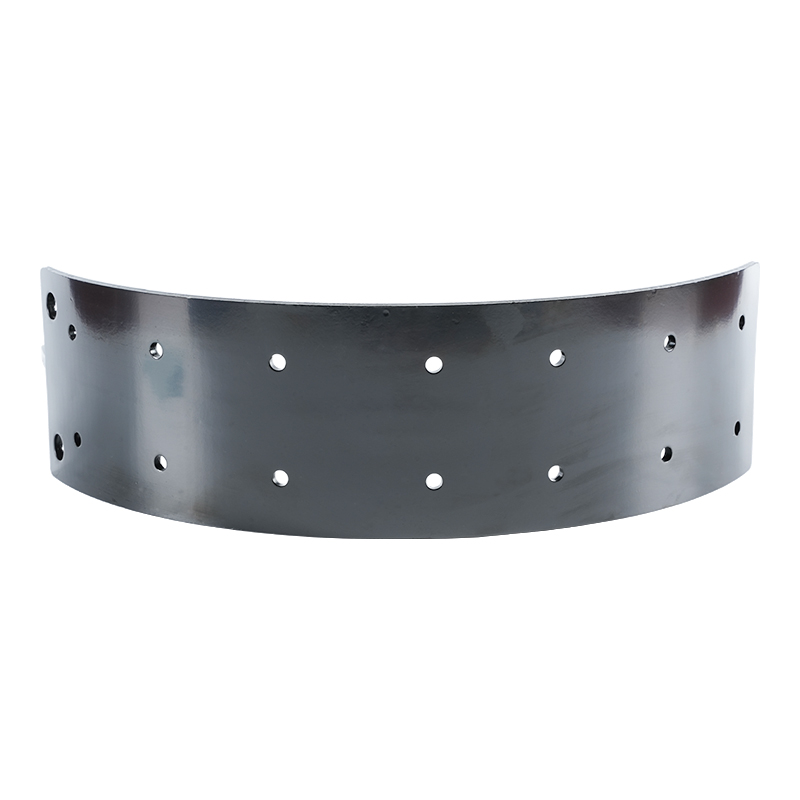
What Is a Brake Shoe and What Does It Do?
A brake shoe is a curved metal component lined with friction material that plays a central role in drum brake systems. When you press the brake pedal, hydraulic pressure forces the brake shoes outward against the inside surface of a spinning drum attached to the wheel. The resulting friction slows the drum — and therefore the wheel — bringing your vehicle to a stop. It's a deceptively simple mechanism that has been reliably stopping cars, trucks, motorcycles, and trailers for over a century.
Brake shoes are most commonly found on the rear axles of passenger vehicles, particularly older models and budget-tier cars that use a hybrid braking setup: disc brakes up front (for the heavy stopping power needed during most braking events) and drum brakes in the rear (for cost efficiency and for integrating the parking brake mechanism). Some light trucks, utility trailers, ATVs, and motorcycles still use drum brakes with brake shoes on all four corners. Understanding how your brake shoes work is fundamental to keeping your braking system safe and responsive.
How the Drum Brake System Works Around the Brake Shoe
To fully understand the brake shoe, you need to understand its context within the drum brake assembly. The system consists of several interconnected components that all work together every time you apply the brakes.
The brake drum is a cylindrical casting bolted to the wheel hub that rotates with the wheel. Inside this drum sits the brake shoe assembly, which is anchored to a fixed backing plate that doesn't rotate. Each wheel typically has two brake shoes — a primary shoe (facing the front of the vehicle) and a secondary shoe (facing the rear). The primary shoe handles less braking force and wears more slowly; the secondary shoe handles the majority of the load and typically wears faster as a result.
When the brake pedal is depressed, a wheel cylinder — a small hydraulic actuator mounted at the top of the backing plate — pushes both shoes outward simultaneously. The friction lining on the outer curved surface of each shoe presses firmly against the drum's inner surface, converting kinetic energy into heat and slowing rotation. Return springs pull the shoes back to their resting position once pedal pressure is released, and an automatic adjuster gradually compensates for friction material wear over time, maintaining proper shoe-to-drum clearance.
Brake Shoe vs. Brake Pad: Understanding the Key Differences
These two components are often confused, but they operate in fundamentally different brake system designs. Here's a clear comparison:
| Feature | Brake Shoe | Brake Pad |
| Brake System Type | Drum brakes | Disc brakes |
| Shape | Curved arc | Flat rectangle |
| Friction Direction | Pushes outward against drum | Clamps inward against rotor |
| Heat Dissipation | Enclosed drum — slower cooling | Open rotor — faster cooling |
| Typical Lifespan | 30,000–70,000 miles | 25,000–65,000 miles |
| Parking Brake Integration | Built in (self-contained) | Requires separate mechanism |
| Self-Energizing Effect | Yes — rotation helps apply force | No |
| Replacement Complexity | Moderate to difficult | Beginner-friendly |
One notable advantage of drum brake shoes is the self-energizing effect: as the drum rotates forward, it drags the leading brake shoe with it, actually increasing the clamping force without additional hydraulic pressure. This makes drum brakes very effective at holding a vehicle stationary, which is why they remain popular for parking brake applications even on vehicles that use disc brakes everywhere else.
Warning Signs Your Brake Shoes Need Replacing
Worn brake shoes don't always announce themselves dramatically. Knowing the early warning signs allows you to address the problem before it becomes a safety hazard or causes expensive damage to the drum itself. Watch for these symptoms:
- Squealing or grinding noise when braking: A high-pitched squeal often indicates the friction material is worn to the metal wear indicators built into the shoe. A grinding noise is more serious — it typically means the metal backing of the shoe is contacting the drum directly, which can score or crack the drum and require its replacement as well.
- Pulling to one side when braking: If one rear brake shoe is more worn than the other, or if brake fluid has contaminated one shoe's lining, braking force will be uneven. The vehicle will pull toward the side with more friction, which can be dangerous at highway speeds.
- Soft or spongy brake pedal: While this more commonly points to hydraulic issues (such as a failing wheel cylinder), worn or improperly adjusted brake shoes can also contribute to increased pedal travel before the brakes engage.
- Reduced braking effectiveness: If your vehicle takes noticeably longer to stop than it used to, or if you need to press the pedal harder than normal, worn friction material is a likely culprit. Don't ignore this symptom — it's a direct safety concern.
- Vibration or pulsing through the pedal: This can indicate uneven wear on the brake shoe lining or an out-of-round drum. If the drum has developed grooves or a lip from prolonged use, replacing just the shoes without addressing the drum will result in premature wear and poor braking performance.
- Parking brake feels loose or ineffective: Since rear drum brake shoes typically serve double duty as the parking brake mechanism, a loose or ineffective handbrake is a direct indicator that the shoes — or their automatic adjuster — need attention.
How to Inspect Brake Shoes Without Removing the Drum
Many brake drums have an inspection hole — a small rubber-plugged port on the backing plate — that allows you to visually check the shoe's friction lining thickness without pulling the wheel or drum. Here's how to perform a basic inspection:
- Safely lift and support the vehicle on jack stands. Never work under a vehicle supported only by a floor jack.
- Locate the inspection hole on the backing plate (inboard side of the drum, facing the vehicle center). Remove the rubber plug with a flathead screwdriver.
- Shine a flashlight through the hole and look at the curved surface of the brake shoe. You should see a distinct layer of friction lining (typically gray or brown) bonded to the metal shoe.
- The minimum safe lining thickness is generally 1/16 inch (1.6mm). If the lining is thinner than this, or if you can see or feel scoring grooves in the drum surface through the gap, it's time for replacement.
- Also look for signs of brake fluid contamination — an oily sheen on the lining surface means the wheel cylinder is leaking and must be repaired before new shoes are installed.
Brake Shoe Replacement: Step-by-Step Overview
Replacing brake shoes is a moderately involved DIY job that requires careful attention to the assembly sequence. Unlike disc brake pads, drum brake components involve multiple springs, clips, and adjusters that must be reinstalled in the correct configuration. It's strongly recommended to replace brake shoes one side at a time, keeping the opposite side intact as a reference for reassembly.
Tools and Parts You'll Need
- New brake shoes (always replace both sides as a set, even if only one side is worn)
- Brake drum micrometer or inside diameter gauge (to check if the drum is within spec)
- Brake spring tool and hold-down spring pliers
- Needle-nose pliers and flathead screwdrivers
- Brake cleaner spray and clean rags
- High-temperature brake lubricant (for contact points only — never on friction surfaces)
- Floor jack, jack stands, and wheel chocks
The Replacement Process
Begin by loosening the lug nuts while the vehicle is still on the ground, then safely jack up and support the vehicle. Remove the wheel and tire. The brake drum may pull off freely, or it may be seized to the hub due to rust — if so, use a rubber mallet to tap it loose, or back off the self-adjuster through the inspection hole to provide clearance. Once the drum is removed, photograph the entire assembly from multiple angles before disassembly. This photo is invaluable during reassembly.
Remove the return springs first using a brake spring tool — these are under considerable tension and can cause injury if they slip. Next, remove the hold-down springs and pins that anchor each shoe to the backing plate. Disconnect the self-adjuster assembly, the parking brake lever linkage, and any remaining clips. The old shoes should now come free.
Clean the entire backing plate with brake cleaner. Inspect the wheel cylinder for any signs of fluid leakage — look for wet residue or a swollen rubber boot. If the wheel cylinder is leaking, replace it before installing new shoes. Apply a thin layer of high-temperature brake lubricant only to the raised contact pads on the backing plate where the shoes slide — never apply lubricant to the friction lining or the drum surface.
Install the new shoes in reverse order of disassembly, referring to your photographs frequently. Reinstall the hold-down springs, self-adjuster, parking brake linkage, and return springs. Reinstall the drum, then manually adjust the self-adjuster by rotating it until the drum just barely drags against the shoes when spun by hand. Reinstall the wheel, lower the vehicle, and pump the brake pedal firmly several times to seat the shoes before driving. Check pedal feel and perform a low-speed brake test in a safe area before returning to normal traffic.
How Long Do Brake Shoes Last and What Affects Their Lifespan?
Rear drum brake shoes typically last between 30,000 and 70,000 miles, and in some cases significantly longer — primarily because rear brakes handle a much smaller share of braking force than front brakes under normal driving conditions. Front brakes (whether disc or drum) absorb roughly 60–70% of stopping energy due to weight transfer during deceleration, leaving the rear brakes to manage the rest. This imbalance means rear brake shoes often outlast front brake pads by a wide margin.
Several factors can significantly shorten brake shoe lifespan:
- Aggressive driving habits: Frequent hard braking generates intense heat that accelerates friction material wear. Drivers who regularly tow heavy loads, drive in mountainous terrain, or make frequent panic stops will replace brake shoes far more often than average.
- Wet and salty environments: Road salt and moisture accelerate rust formation on the brake drum's inner surface. A rusted drum acts like sandpaper against the shoe lining, dramatically increasing wear rate. Light surface rust is normal and clears with the first few brake applications, but deep pitting requires drum resurfacing or replacement.
- Infrequent driving: Paradoxically, vehicles that sit idle for extended periods can experience accelerated brake shoe deterioration. Moisture causes the drum to rust, and when the vehicle is finally driven, the rough drum surface chews through the lining rapidly. The parking brake can also seize the shoes against the drum if left engaged for weeks.
- Contamination: Oil or brake fluid on the friction lining from a leaking axle seal or wheel cylinder causes the lining to glaze and lose effectiveness. Contaminated shoes must be replaced — the contamination cannot be cleaned off.
- Out-of-adjustment self-adjuster: A seized or corroded automatic adjuster fails to compensate for wear, causing the pedal to travel further before the shoes contact the drum. This also means the shoes eventually contact the drum at an oblique angle rather than flush, causing uneven and accelerated wear.
Brake Shoe Replacement Cost: What to Expect
The cost of replacing brake shoes varies depending on vehicle make, whether you're doing it yourself or hiring a shop, and whether the drums also need service. Here's a general cost breakdown:
| Service | DIY Cost (Parts Only) | Shop Cost (Parts + Labor) |
| Brake shoes (rear axle set) | $20–$80 | $150–$350 |
| Drum resurfacing (per drum) | N/A (machine shop job) | $20–$40 per drum |
| Drum replacement (per drum) | $30–$100 each | $80–$180 each installed |
| Wheel cylinder replacement | $15–$40 each | $80–$150 each installed |
| Full rear drum brake service | $80–$200 | $250–$600 |
When getting brake work done at a shop, always ask whether the drums will be measured and resurfaced or replaced as part of the job. Installing new brake shoes on scored or out-of-spec drums is false economy — the new shoes will wear rapidly and unevenly, and you'll be back in the shop sooner than necessary. Many shops include drum resurfacing as standard practice with a shoe replacement, but it's worth confirming upfront.
Choosing the Right Brake Shoes for Your Vehicle
Brake shoes are not a one-size-fits-all component. They're engineered to specific dimensions and friction coefficients for each vehicle application. When sourcing replacements, you have several quality tiers to choose from:
- OEM (Original Equipment Manufacturer) brake shoes are made to the exact specifications of your vehicle's factory design. They offer the most predictable fit and performance but are typically the most expensive option and usually require purchase through a dealership.
- OE-equivalent aftermarket shoes from reputable brands like Raybestos, Wagner, Bendix, ACDelco, and Bosch are manufactured to match OEM specs and are widely available at auto parts stores. For most passenger vehicles, these offer excellent value and performance comparable to the original parts at a lower price.
- Premium performance brake shoes are formulated with higher-grade friction compounds for improved fade resistance under heavy use. These are worth considering for trucks that frequently tow, vehicles driven in mountainous areas, or any application where the brakes are subjected to above-average heat and stress.
- Budget or unbranded brake shoes should be approached with caution. Inconsistent friction material quality can result in poor braking performance, excessive noise, or premature wear. Given that brakes are a primary safety system, saving a few dollars on the cheapest possible shoe is rarely worth the risk.
Always match the brake shoe to your vehicle's year, make, model, and trim level using a parts catalog or the fitment lookup tool at your auto parts retailer. If your vehicle has been modified — particularly with larger wheels or increased load capacity — consult a brake specialist to ensure your drum brake system is properly matched to the new demands being placed on it.


Copyright © Zhejiang Langrun Auto Parts Co., Ltd. All rights reserved. Heavy-Duty Brake Shoe Manufacturer in China

