 Eng
Eng  中文简体
中文简体 Home / News / Industry News / The Complete Guide to the 4702 Brake Shoe Assembly: What It Is, How It Works, and When to Replace It
 The Complete Guide to the 4702 Brake Shoe Assembly: What It Is, How It Works, and When to Replace It
 2026.06.17
 Industry News
The 4702 brake shoe assembly is a specific drum brake component used across a range of light trucks, vans, and utility vehicles. If you're searching for this part number, chances are you're either planning a brake job, diagnosing a braking problem, or trying to understand what's actually inside that drum at the rear axle. This guide covers everything practical — what the assembly includes, how it functions, how to recognize wear, and what to look for when buying a replacement.
Content
- 1 What the 4702 Brake Shoe Assembly Actually Includes
- 2 How the Drum Brake Shoe Assembly Works
- 3 Vehicle Applications for the 4702 Brake Shoe Set
- 4 How to Tell When Your 4702 Brake Shoe Assembly Needs Replacing
- 5 Step-by-Step Overview of 4702 Brake Shoe Installation
- 6 Choosing Between OEM and Aftermarket 4702 Brake Shoe Replacements
- 7 Common Mistakes to Avoid When Replacing Brake Shoe Assemblies
- 8 Maintenance Tips to Get the Most Life Out of Your 4702 Brake Shoes
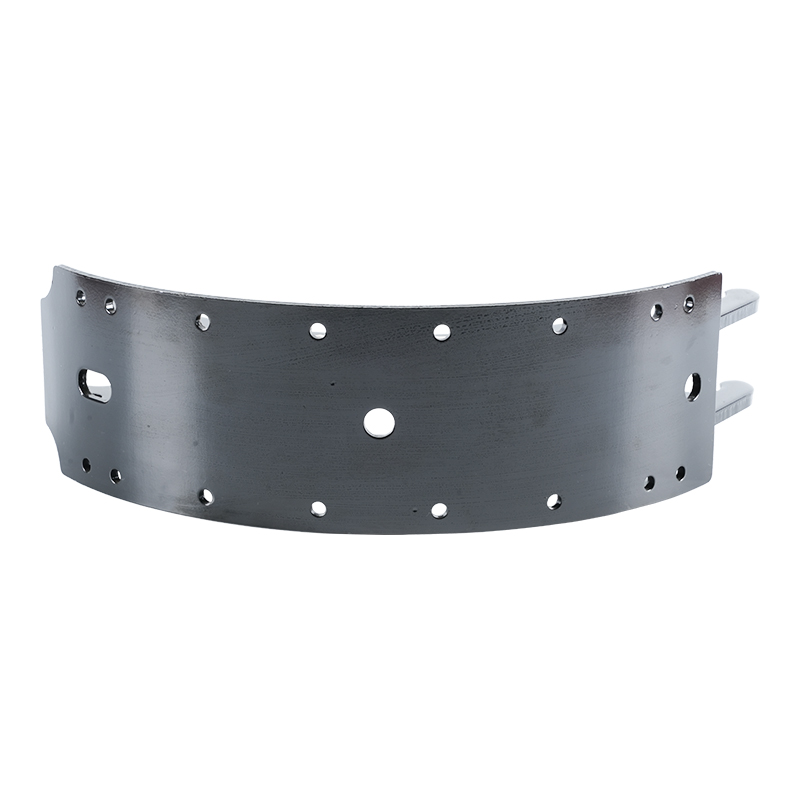
What the 4702 Brake Shoe Assembly Actually Includes
The 4702 designation refers to a brake shoe set — typically sold as a paired axle kit covering both the left and right sides of a rear drum brake system. Unlike disc brake pads, which are simple friction material bonded to a flat backing plate, a drum brake shoe assembly is a more complex unit that curves to match the interior radius of the brake drum.
A complete 4702 brake shoe assembly kit generally contains the following components:
- Primary brake shoes: The forward-facing shoes in a leading-trailing setup, typically shorter or with thinner lining material, designed to handle lighter braking loads.
- Secondary brake shoes: The rear-facing shoes that carry the greater share of braking force due to self-energization; these typically have thicker lining material.
- Friction lining material: Bonded or riveted to the curved steel shoe platform; the lining compound varies by application and determines stopping power, fade resistance, and noise characteristics.
- Return springs (in some kits): Springs that retract the shoes away from the drum surface when the brake is released; not all 4702 kits include these — verify before purchase.
- Hardware package: Depending on the manufacturer, the kit may include hold-down pins, adjuster star wheels, adjuster levers, or clips specific to the vehicle platform.
Always check the contents listing for any specific 4702 kit you're ordering, since aftermarket suppliers vary in what hardware they bundle. Some premium kits include a full hardware refresh; economy kits supply shoes only.
How the Drum Brake Shoe Assembly Works
Understanding the operating principle of a drum brake shoe assembly helps you diagnose problems and install replacements correctly. The core mechanism is fundamentally different from disc brakes, and the geometry matters.
The Self-Energizing Effect
In a leading-trailing drum brake, when hydraulic pressure from the wheel cylinder forces the shoes outward against the rotating drum, the leading shoe experiences a self-energizing effect. The drum's rotation drags the leading shoe into tighter contact with the drum surface, amplifying the braking force beyond what the hydraulic pressure alone could produce. This is why the secondary (trailing) shoe carries more load — the geometry directs more of the braking reaction force through it. The 4702 assembly is designed around this principle, which is why the primary and secondary shoes are not interchangeable — they have different lining lengths or thicknesses to match their respective loading roles.
The Role of the Adjuster
As the friction lining wears down, the shoes must travel further outward before contacting the drum, which increases pedal travel and reduces braking responsiveness. The adjuster — typically a star wheel mechanism located between the two shoes — compensates for this by gradually increasing the at-rest shoe diameter. In most vehicles using the 4702 brake shoe assembly, the adjuster is actuated automatically during reverse braking or by the parking brake mechanism. If the adjuster seizes due to corrosion, the brakes will feel spongy and pedal travel will increase even with serviceable lining remaining.
Parking Brake Integration
On rear axle drum brake systems, the shoe assembly also serves as the parking brake mechanism. A separate lever attached to the secondary shoe is pulled by the parking brake cable, mechanically forcing the shoes against the drum independent of hydraulic pressure. This dual function means the condition of the rear shoe assembly directly affects parking brake holding ability, which is a safety-critical consideration.
Vehicle Applications for the 4702 Brake Shoe Set
The 4702 part number is used across multiple aftermarket brake brands and cross-references to a range of vehicle fitments. The exact applications vary slightly by manufacturer, but this assembly is commonly associated with light trucks and full-size vans from domestic manufacturers. Before ordering, always verify fitment using your vehicle's year, make, model, and rear axle type. The table below shows typical application categories associated with the 4702 brake shoe assembly:
| Vehicle Type | Typical Drum Size | Axle Position | Notes |
| Light-duty pickup trucks | 10" or 11" | Rear | Includes parking brake function |
| Full-size vans | 11" or 12" | Rear | Higher lining mass for load-carrying use |
| SUVs with rear drums | 10" | Rear | Verify axle ratio and brake package |
| Medium-duty commercial vehicles | 12" or larger | Rear | May require heavy-duty lining grade |
When cross-referencing the 4702 number across brands such as Wagner, Raybestos, ACDelco, or Bendix, slight differences in lining formulation, hardware inclusion, and shoe arc geometry may exist. Always confirm that the replacement shoe arc matches your drum's internal diameter to ensure full contact across the lining surface.
How to Tell When Your 4702 Brake Shoe Assembly Needs Replacing
Drum brake shoe wear is less visible than disc brake pad wear because the components are enclosed inside the drum. You can't do a quick visual check through the wheel spokes the way you can with disc brakes. Here are the reliable indicators that your brake shoe assembly has reached the end of its service life:
- Squealing or grinding noise from the rear: A high-pitched squeal often indicates the lining has worn to its minimum thickness. A grinding or metal-on-metal sound means the lining is completely gone and the steel shoe platform is contacting the drum — immediate replacement is required.
- Increased pedal travel: If the brake pedal feels lower than normal before the brakes engage, the shoes may have worn down beyond what the adjuster can compensate for, or the adjuster itself may have seized.
- Vehicle pulling to one side under braking: Uneven wear between the left and right shoe assemblies, or a seized wheel cylinder on one side, causes the vehicle to track sideways during braking. This is both a wear indicator and a safety concern.
- Weak or ineffective parking brake: If the vehicle rolls when parked on a slope with the parking brake applied, the rear shoes have likely worn to the point where they can no longer generate enough holding force.
- Lining thickness below 1/16 inch (1.5mm): When inspecting through the drum's inspection port or after removing the drum, measure the remaining lining thickness. Replace the 4702 brake shoe set before lining reaches the rivet heads (on riveted linings) or below 1.5mm on bonded linings.
- Glazed, cracked, or contaminated lining: Lining that has been overheated, oil-contaminated from an axle seal leak, or surface-glazed from gentle use will not meet its rated friction coefficient. Visual inspection after drum removal can confirm these conditions even if lining thickness is adequate.
Step-by-Step Overview of 4702 Brake Shoe Installation
Installing a 4702 brake shoe assembly is a DIY-achievable job for anyone with mechanical experience and the right tools. The process follows the same sequence on most vehicles using this shoe set. This overview covers the critical steps and common mistakes — consult a service manual for torque specifications and vehicle-specific procedures.
Preparation and Safety
Safely raise and support the vehicle on jack stands — never work under a vehicle supported only by a floor jack. Chock the front wheels. Release the parking brake fully before beginning. Work on one side at a time; keeping the opposite drum assembly intact gives you a reference for reassembly when you're unsure where a spring or clip goes.
Drum Removal and Inspection
Remove the wheel and the brake drum. If the drum is seized to the hub flange due to corrosion, use the drum's threaded puller holes (if present) or apply penetrating oil and gentle heat — avoid hammer blows directly on the drum friction surface. Once removed, measure the drum's internal diameter with a drum micrometer. If the drum diameter exceeds the maximum diameter cast into the drum face (typically the stamped "Max. Dia." figure), the drum must be replaced, not resurfaced. A worn-out drum paired with new 4702 brake shoes will produce poor contact and inconsistent braking.
Removing the Old Shoe Assembly
Use a brake spring removal tool to unhook the return springs — attempting this without the proper tool risks injury from spring tension and damaged hardware. Remove the hold-down pins and clips, then disengage the adjuster assembly and parking brake lever connection. Photograph the assembly before disassembly if this is your first time; the spring routing and adjuster orientation are easy to mix up during reassembly.
Installing the New 4702 Shoe Assembly
Transfer the parking brake lever to the new secondary shoe if it is not included in the kit. Install the adjuster assembly between the shoes and verify the adjuster star wheel is oriented correctly — the adjustment direction must match the wheel's rotation for self-adjustment to function. Attach hold-down hardware, then install return springs using the brake spring tool. Before reinstalling the drum, back off the adjuster so the drum slides over the shoes without binding. After reinstalling the drum and wheel, pump the brake pedal firmly several times to seat the shoes, then adjust the parking brake cable tension if required.
Bedding In the New Brake Shoes
New friction lining needs a break-in process to achieve full contact with the drum surface. Perform 8–10 moderate stops from 30 mph, allowing the brakes to cool between stops. Avoid hard stops or prolonged dragging during the first 200 miles. Proper bedding in transfers a thin, even layer of lining material onto the drum surface, which improves braking performance and reduces the risk of glazing or uneven wear early in the shoe's service life.
Choosing Between OEM and Aftermarket 4702 Brake Shoe Replacements
The aftermarket offers the 4702 brake shoe assembly across a wide price range, from economy value-line products to performance-grade linings. Here's a practical breakdown of what differentiates these tiers:
| Category | Lining Material | Hardware Included | Best For |
| Economy aftermarket | Basic organic or semi-metallic | Shoes only | Low-mileage secondary vehicles, budget repairs |
| Mid-range aftermarket | Improved semi-metallic or NAO | Shoes + springs | Daily drivers, standard use |
| Premium aftermarket | High-friction semi-metallic or ceramic-enhanced | Full hardware kit | Towing, heavy loads, fleet vehicles |
| OEM replacement | Matches original specification exactly | Varies by vehicle brand | Warranty repairs, original performance restoration |
For most vehicles, a mid-range or premium aftermarket 4702 brake shoe set from a reputable brand such as Wagner ThermoQuiet, Raybestos, or Bendix provides performance comparable to OEM at a lower price. The key is to replace the full hardware kit — springs, adjuster, and hold-down hardware — at the same time as the shoes. Reusing fatigued springs or a corroded adjuster with new shoes is a common mistake that leads to poor adjustment, noise, and premature lining wear.
Common Mistakes to Avoid When Replacing Brake Shoe Assemblies
Even experienced mechanics make avoidable errors during drum brake shoe service. These are the most frequently encountered mistakes when working with the 4702 brake shoe assembly:
- Installing primary and secondary shoes on the wrong positions: The shoes are not interchangeable. Installing the thinner primary shoe in the secondary position reduces braking force significantly. Always verify which shoe is primary and which is secondary before assembly.
- Skipping drum resurfacing or replacement: New shoes against a grooved or out-of-round drum will wear unevenly and produce noise from day one. Always measure the drum and resurface or replace it as needed.
- Contaminating the new lining with brake fluid or grease: Even a small amount of grease or brake fluid on the lining surface permanently degrades friction performance. Handle new shoes from the ends and clean the backing plate contact points thoroughly before installation.
- Over-applying brake lubricant: A thin film of high-temperature brake grease belongs on the shoe-to-backing plate contact points (the raised pads or ledges). It does not belong anywhere near the lining or drum surface. Excess lubricant migrates onto the lining during operation.
- Failing to check the wheel cylinder: A leaking wheel cylinder will contaminate the new shoes within weeks. Inspect the cylinder boots for brake fluid seepage and replace the cylinder if any leakage is present before installing new shoes.
- Not adjusting the shoes before the test drive: Failing to pre-set the adjuster to near-drum diameter means the first several brake applications feel soft and ineffective. Back off just enough for drum clearance, then pump the pedal before moving the vehicle.
Maintenance Tips to Get the Most Life Out of Your 4702 Brake Shoes
With proper maintenance practices, a quality set of 4702 brake shoes can last 30,000 to 70,000 miles depending on driving conditions, vehicle load, and lining compound. Here's how to protect that investment:
- Inspect at every tire rotation: Remove a drum from each side at every other tire rotation interval and check lining thickness, drum condition, adjuster function, and wheel cylinder condition. Early detection of a developing problem costs far less than emergency repairs.
- Keep the adjuster free: Apply a small amount of anti-seize compound to the adjuster threads at each brake service. A seized adjuster is the single most common cause of accelerated rear shoe wear, because the shoes cannot self-compensate for wear and begin dragging against the drum.
- Address axle seal leaks immediately: Rear axle seal leaks allow gear oil to enter the drum and saturate the brake lining. This is not repairable — contaminated shoes must be discarded, and the seal must be replaced before new shoes are installed.
- Use the parking brake regularly: Contrary to what some drivers believe, using the parking brake on every park cycle actually keeps the rear shoe assembly in better condition. Regular use exercises the adjuster mechanism, prevents shoe-to-drum adhesion from corrosion, and maintains cable and lever movement.
- Replace shoes in axle sets: Always replace both the left and right brake shoe assemblies at the same time. Mismatched lining thickness between sides causes uneven braking force distribution and vehicle pull under braking.


Copyright © Zhejiang Langrun Auto Parts Co., Ltd. All rights reserved. Heavy-Duty Brake Shoe Manufacturer in China

